Sunday, January 30, 2011

Iris Folding Valentine

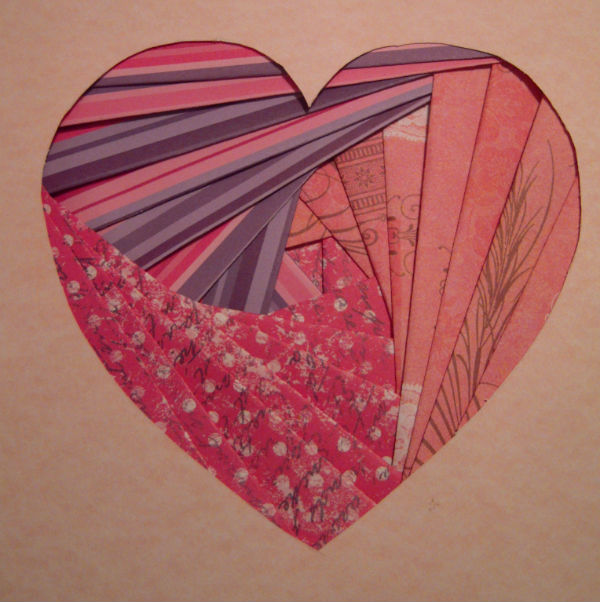
I am a huge fan of Iris folding; it looks so complex, but it is actually quite simple. I have used Iris Folding for birthday cards and Christmas Cards, to decorate a house and to gift to a friend. It is definitely a multipurpose kind-o-craft. If you would like to make this heart, you can find a template: HERE and for instructions on how to make your own Iris folding patterns from scratch go HERE. To give you a sense of my process (I made up this pattern above, just to try making my own) here's a little photo recap:

The writing is fairly faint, but you can see the lines and numbers I sketched out. The first part of my project was to make a drawing of a heart and cut it out of cardstock. Then I had to impose a triangle shape over it and, using a ruler, decrease the size of the triangle by 3/4 inch increments. Once that is done, I label each segment with a number and keep track of which paper corresponds to each number (ex: striped paper = numbers 2, 5, 8, 11, 14, 20, 23, etc) to help me keep track of where each paper piece goes. 
Next, you flip the front of the cardstock (the side people will see) over so that is is facedown and you pattern cutout is in it's place in the middle. Using the paper that corresponds to each number, fold the paper and cover each segment, taping them lightly down on either end. Work in a clockwise motion around the pattern. 
You'll be so surprised once you flip it over. They always come out so fantastic!! You'll be getting lots of ooo's and ahhh's over this craft I promise. :-)
Don't you just love the way the paper lays in the pattern. I think it's beautiful!!!


I shared this project at these fabulous Linky parties!!
Works For Me Wednesdays
Three Or More Tuesdays 


Making


Its So Very Cheri
mmm button
The DIY Show OffToday's Creative Blog


The Girl Creative

mmm button


Make it Yours @ My Backyard Eden

http://www.thethriftyhome.com


It's a Blog PartyDragonfly Designs


HookingupwithHoH

giveaways


Fantabulous Friday!


e01b99


Passionately Artistic


Join  us Saturdays at tatertotsandjello.com for the weekend wrap 
 up           party!


Sumo Sweet Stuff

Tute yourself tuesday red and white

Photobucket
Show and Tell Green

http://www.thethriftyhome.com
Chic on a Shoestring Decorating

Funky Junk's Saturday Nite Special

Photobucket
UndertheTableandDreaming

Sunday, January 23, 2011

Sweetheart Valentine Wreath

How 'bout a little sweetheart wreath for your.....well............Sweetheart?? This one is yet another simple simple simple craft to do. Here's what you need:
Sweetheart Candies (Be sure to use the brand Sweethearts....Conversation Hearts are too powdery and don't glue very well at all. )
Wreath Shape
Fabric 
Hot Glue
Ribbon
~Wrap your wreath with a long thin strip of fabric (the color of your choosing) and hot glue the two ends in place. 

~Hot glue each and every one of those Sweethearts on to the wreath....make a pattern, don't make a pattern......no big whoop....it's a candy wreath. We can't go wrong. 
~Tie a ribbon in a loop around the wreath and attach where you know your Sweetheart will see it and look at you adoringly and think.......GAWD she has some time on her hands!! Just kidding. He or she had better love it, is all I'm saying.


I linked this post up to these Fantabulous Parties:


The DIY Show Off


The Girl CreativeThe Trendy Treehouse


Sumo Sweet StuffUndertheTableandDreaming


Today's Creative Blog

topsy turvy tuesdays


Creations by Kara


Show and Tell Green


Make it Yours @ My Backyard Eden


Tute yourself tuesday red and whiteNightOwlCrafting


giveaways


Beyond The Picket Fence


Fantabulous Friday!

Chic on a Shoestring Decorating


Its So Very Cheri
It's a Blog Party
Making


HookingupwithHoH
Join  us Saturdays at tatertotsandjello.com for the weekend wrap 
 up           party!

Chic on a Shoestring Decorating

Photobucket